
Monday, July 27, 2015
Wednesday, July 1, 2015
Breaking A Small Glass Ceiling
I try to keep this blog light and friendly but this post will be nothing of the sort. I'm pissed and I'm going to write about it. So, if you're not in the mood for a rant close this now - I understand and we're still good ;)
First of all, here is the article that broke this Mom.
http://chicksontheright.com/blog/item/29158-ridiculous-toronto-schools-bows-to-sharia-law-during-a-soccer-game
Let me break this article down for you. The two girls on the team were benched because the opposing team called Sharia Law at half time.
See Daughter B played on a rep travel soccer team in a boys league. So I have first hand knowledge of what it's like being a girl on a boys team. Let's start the story shall we?
 |
| B rocking the throw in |
It wasn't typical February Saturday in our little town. Sure it was cold but there was spring fever running rampant in the Life & Food house. Why? Because it was soccer sign up day. A day almost better than Christmas.
Hubster & I made sure the girls were bundled up and we headed to the church where the sign ups were being held. We were old pro's to the process by now, head in, find the girls birth year table, grab the re-enrollment forms, change any info & sign them, head to the cashier table.
 |
| B taking it down the line |
This year though we were stopped by one of the coach's that we knew well. She was manning the travel soccer table and asked if Daughter B was interested in trying out for the team - the boys team. Of course B was all over the idea so we signed her up for that too. Try outs starting in March.
Once we got home Hubby and I knew that we had to have a discussion with her about being on a rep team and a boys rep team at that. We told her that being on a travel team meant a lot of practices, a lot of out of town games, plus she would still have to attend her house league games, and that's only if she made the cut - there was no guarantee's she would even be chosen. Trying to explain that she may be the only girl was a bit trickier but we got through it. We pretty much knew that she'd make the cut but there was some tough competition. We explained that being a girl didn't automatically get her in because it was a boys teams and they would only pick her if she could out play the boys.
 |
| B's first tournament with the boys |
After two weeks of pretty intense try outs we were told the good news; she'd made it. Her first question was did the girl friend she had made during the practices made it too. We had to tell her no, she was the only girl. Again we verified with her that this was something she really wanted to do. She was a little sad that her friend wouldn't be with her but she was all in.
Practices started the next week and the boys on the team were very welcoming, even psyched really. They knew how good she was and how the entire team would benefit from her being a member. Even the parents commented how thrilled they were to have her there. Nobody cared that she was a girl.
 |
| B got called up to help out A's team |
After a week or so of practices the coaches had worked out first and second strings. Not only was she first string, she was a forward/striker! I can't tell you how big my heart swelled with the news. A small glass ceiling had shattered for my baby girl and she didn't even know it.
Once the season had officially started and we were travelling all over Southern Ontario it seemed. I noticed that parents on the other teams were completely shocked at the sight of her. I heard comments like 'Why is there a girl on that team? Is that allowed?', or 'There can't be good enough boys in that town if they let a such a little girl play' (and let me tell you some pretty talented boys didn't make it - they tried out around 30ish kids for this team) and some other very mean comments that will never be repeated in fear that one day B will read this post. B is little, always has been; but what she lacks in height and mass she makes up for in aces for speed and intuition - ignorance is bliss you mean parents. See, I'm not one for immediate confrontation especially if I know that these people will look like complete assholes all on their own. Once that ref's whistle was blown and that ball was kicked there was no stopping my girl. She out ran and out maneuvered their little princes every time! And she had an entire team of talented boys on her side to help her out. What kills me is I never heard a bad comment from the other players, it was always from the parents.
 |
| B going in for the pass (she got the goal) |
So, when I read articles like this it completely strikes the wrong cord with this girl mom. Hubby & I have never instilled gender rolls with our girls. They were raised as people who can do anything and be anything they want and absolutely no one has the right to tell them they can't. If they wanted dolls or hot wheels it didn't matter to us. All that mattered was they are happy and prepared to face the world head on & confident. If I was the coach (and I hope B's coach would act in a similar fashion) I'd tell the other team to stuff it! Their team can take the forfeit (to hell with the point spread for our own team) those girls out played all the others that were cut and earned her right to play with the boys. Win or lose, it should always be about whats best for every player on the team, girl or boy. We live in an enlightened society (I thought) and to pull something like this crap infuriates me. Bowing down to some archaic belief is unforgivable.
 |
| B having a break with the boys |
A final note to the mean parents out there. If you see a girl on a boys team know this; she worked her ass off to get there. So take your head out of your own ass, keep your negative comments to yourself, and cheer her on.
 |
| Never underestimate this face. 'And although she may be but little she is fierce' ~William Shakespeare~ |
Stay Sweet
Tammy
Tuesday, June 23, 2015
Veggie & Bacon Western Sandwich
Well, mom's and dad's we did it! Another school year has finished. Hopefully, your little Einstein's did well. It was a bit of a challenging year here at Life & Food because Daughter B started high school and didn't take the transition well at the beginning. She did manage to pull up her socks and rock 9th grade by the end. Good luck in Grade 10 Superstar! How did your kids fair this year?
Today's recipe is great for the lazy day's of summer. We do brunch in our house quite often since we like sleeping late and nobody is really a 'wake up and immediately eat' type. This sandwich is great for such an occasion; it's loaded with veggies and proteins to keep you going.


Today's recipe is great for the lazy day's of summer. We do brunch in our house quite often since we like sleeping late and nobody is really a 'wake up and immediately eat' type. This sandwich is great for such an occasion; it's loaded with veggies and proteins to keep you going.
Veggie & Bacon Western Sandwich

Makes: 2 Sandwiches
Ingredients:
2 Large Eggs
2 tbsp Milk
Salt & Pepper to taste
2 tbsp Sweet Red Pepper, diced into small cubes
1 Green Onion, diced
6 - 8 Spinach Leafs
Sharp Cheddar Cheese, grated (as much or a little as you'd like)
4 slices Bacon (2 per sandwich)
2 - 4 slices Tomato (1 - 2 per sandwich)
Mayonnaise
Butter/Margarine
4 slices Bread, toasted
Directions:
1. Melt a small amount of butter/margarine in a frying pan. In another pan start your bacon.
2. While your pan is heating up beat together the eggs with the milk, salt and pepper. Stir in the diced red pepper and onion.

3. Gently pour the egg into the prepared pan making sure that the peppers and onions are well distributed. Fry on both sides and once done add the cheese to one half of the omelette, fold it over and let the cheese melt. Using your flipper cut the folded omelette in half.
4. Toast your bread while your cheese melts and start assembling. I like a little butter & mayo on my sandwich but it's completely optional - do it up the way you like. Lay down a bed of spinach to cover the bread, add the egg, tomato, and bacon. Cut in half & enjoy!

Stay Sweet!
Tammy
Wednesday, June 10, 2015
Chicken & Strawberry Spring Mix Salad
Chicken & Spinach Spring Mix Salad
 |
| Chicken & Strawberry Spring Mix Salad |
Ingredients:
1 - 5 oz pkg Spinach & Arugula mix
2 Chicken breasts
3 - 4 Strawberries
4 Green Onions, chopped
1/2 tsp Paprika
Salt & Pepper
Raspberry Vinaigrette (or your favourite dressing)
Directions:
1. Season your chicken breasts with the paprika, salt, and pepper and grill, either on the bbq or since when I made this salad we were in the middle of a torrential down pour I used my cast iron grill pan.


I love this salad. It's super easy to make and very good for you too. Give it a try and let me know what you think.

Stay Sweet
Tammy
Monday, June 8, 2015
Music Monday
If you're going to dance with me, this should be the song that's playing.
Stay Sweet
Tammy
Stay Sweet
Tammy
Saturday, May 30, 2015
Fries Con Queso
Weekends are for kicking back, relaxing, and not having to put too much thought into anything. I know that with kids the kicking back and relaxing usually has to wait until bedtime but there are days that just require deep deck sitting and a very large, very cold adult beverage and a simple dinner while the kids just run around the backyard. By simple I don't mean boring. And I'm going to make your day today. No thought and definitely no rushing to the grocery for obscure ingredients. I'm willing to bet that you're going to have everything on the list already in your fridge.


Fries Con Queso
 |
| Fries Con Queso |
Ingredients:
1/2 cup Kraft Cheez Whiz
1/4 cup Salsa, your favourite kind
Frozen French Fries
Directions:
1. Make your fries as directed.
2. Microwave the cheez whiz for about 30 seconds on high. Even if it's not completely melted a good stirring usually finishes it up. Stir in the salsa until combined. Pour over fries & enjoy!

Like seriously, how easy is that! It's just not good on fries, add it to hot dogs, burgers, nacho's, anything that requires an excellent cheese sauce. Give it a try, you won't be disappointed!

Stay Sweet!
Tammy
Tuesday, May 26, 2015
Venison, Broccoli, & Spinach Stir Fry
Getting your hands on venison in these parts can be tricky. Most people have a friend or a friend of a friend that hunts but getting them to give up a morsel of their prize can take some serious negotiations. I'm talking about, you'll have to be willing to give up your first born or have to promise to re-roof their two storey house on the hottest day of the year and you have a fear of heights kind of negotiating. It's not usually easy and it's definitely not something you can just pick up at the grocery store. We lucked into a few cuts from a friend who received a bit too much for his own use (a bachelor) and considered it a sin to go to waste, I completely agree.
Working with wild game, especially meats like moose and deer can be difficult. Each has a level of 'game-iness' to them and you never really know how intense that taste is until it's cooked. There is trick to cut that down and that's milk! The higher the fat level in the milk the better. I don't know the science behind it (probably something with the natural enzymes) but I do know that it works wonders.
Ingredients:
1.5 lbs Venison
Milk
1.5 cups Broccoli
1 cup Spinach, chopped
1.5 cups All-purpose Flour
1 tsp Garlic Powder
1/2 tsp Ginger Powder
Salt & Pepper
1 pkg Blue Dragon Beef & Broccoli Stir Fry Sauce
Sesame Seeds, optional
Directions:
1. Defrost your venison and place in a deep dish. Pour enough milk over to cover. Remember, the higher the fat content the better. I've used 2%. Wrap the dish is plastic wrap and refrigerate for a minimum of 4 hours or as long as over night.

2. Drain the milk and remove any of the tough connecting tissue from the cuts with a good, sharp fillet knife. Dice into smaller bite size pieces.

3. Combine the flour and seasonings in a small bowl. Lightly coat each piece of the venison in the flour mixture. Preheat a large frying pan and add a small amount of butter. Add enough of the coated meat to cover the bottom of the pan without crowding. I had to do two batches. Fry until a nice crust forms on all sides about 2 minutes each side, keeping watch over any of the smaller, thinner pieces. Remove each piece as it finishes cooking and set aside. Repeat for any remaining pieces.

4. In the same pan add about 1/3 cup of water and the broccoli. Once the broccoli is starting to turn bright green add the spinach. Let the spinach wilt and the water evapourate. Return the venison to the pan and add the package of stir fry sauce to heat.

5. Place in a serving dish and garnish with the sesame seeds. Enjoy!
Stay Sweet!
Tammy
Working with wild game, especially meats like moose and deer can be difficult. Each has a level of 'game-iness' to them and you never really know how intense that taste is until it's cooked. There is trick to cut that down and that's milk! The higher the fat level in the milk the better. I don't know the science behind it (probably something with the natural enzymes) but I do know that it works wonders.
Venison, Broccoli, & Spinach Stir Fry
 |
| Venison, Broccoli, & Spinach Stir Fry |
Ingredients:
1.5 lbs Venison
Milk
1.5 cups Broccoli
1 cup Spinach, chopped
1.5 cups All-purpose Flour
1 tsp Garlic Powder
1/2 tsp Ginger Powder
Salt & Pepper
1 pkg Blue Dragon Beef & Broccoli Stir Fry Sauce
Sesame Seeds, optional
Directions:
1. Defrost your venison and place in a deep dish. Pour enough milk over to cover. Remember, the higher the fat content the better. I've used 2%. Wrap the dish is plastic wrap and refrigerate for a minimum of 4 hours or as long as over night.

2. Drain the milk and remove any of the tough connecting tissue from the cuts with a good, sharp fillet knife. Dice into smaller bite size pieces.

3. Combine the flour and seasonings in a small bowl. Lightly coat each piece of the venison in the flour mixture. Preheat a large frying pan and add a small amount of butter. Add enough of the coated meat to cover the bottom of the pan without crowding. I had to do two batches. Fry until a nice crust forms on all sides about 2 minutes each side, keeping watch over any of the smaller, thinner pieces. Remove each piece as it finishes cooking and set aside. Repeat for any remaining pieces.

4. In the same pan add about 1/3 cup of water and the broccoli. Once the broccoli is starting to turn bright green add the spinach. Let the spinach wilt and the water evapourate. Return the venison to the pan and add the package of stir fry sauce to heat.

5. Place in a serving dish and garnish with the sesame seeds. Enjoy!
 |
| Venison, Broccoli, and Spinach Stir Fry |
Stay Sweet!
Tammy
Monday, May 25, 2015
Saturday, May 23, 2015
Sausage Stuffed Peppers
I don't know how it happened but there's nothing scheduled around the Life & Food household this weekend. No running around, no "I have to be <someplace> at <such time>". It's late in the afternoon and I'm still in my PJ's without a care in the world. I love these types of days <3 . I am considering heading outside to finish up prepping the garden but for me that's still a lazy task - just me, my tunes, and the weeds. I am happy to report that after 4 years of waiting and watching a little plant grow, my lilac tree has finally bloomed and it's beautiful!

What are you doing today? Over-scheduled & going crazy or kicking back & enjoying a beautiful Spring day? Do you know what works well on a either type of day? An easy, delicious meal that takes almost no time at all to prepare. I'm here to provide you the instructions for that kind of meal! I'm so nice, aren't I? Let's get this started!

Ingredients:
2 large Green Peppers
2 Mild Italian Sausages
1/2 small Onion
1/2 cup Marinara Sauce
1/2 tbsp Italian seasoning
1 cup Sharp Cheddar, grated
1 tbsp Grated Parmesan
Spaghetti Noodles
Parsley for garnish, optional
Directions:
1. Put a pot of water on to boil for the noodles & cook, as always, according to the package. I do break the noodles in half before adding to the water, it makes stuffing the peppers a little easier. Cut the peppers in half, de-seed, and wash, set aside to drip dry. I just set them upside down on a paper towel until I'm ready to use them.
2. Chop your onion and add to a small frying pan with a little butter/oil. De-case the sausage into the pan and add the Italian Seasoning. Fry until lightly browned.

3. Once the sausage is browned and the noodles are done & drained combine both with the marinara sauce.

4. Divide the noodle mixture between each of the pepper halves. Remember to push it into any of the curves and bends in the pepper. Place in an oven safe dish and top with the cheddar and sprinkle on the parmesan.

5. Bake in a preheated 425*F oven for 20 - 30 minutes. Keep an eye on the cheese, you don't want it to burn but you do want the pepper to soften. If the cheese is browning too quickly, cover with aluminium foil. When done sprinkle with the parsley to add a little colour and serve. Enjoy!

Stay Sweet!
Tammy

What are you doing today? Over-scheduled & going crazy or kicking back & enjoying a beautiful Spring day? Do you know what works well on a either type of day? An easy, delicious meal that takes almost no time at all to prepare. I'm here to provide you the instructions for that kind of meal! I'm so nice, aren't I? Let's get this started!
Sausage Stuffed Peppers

2 large Green Peppers
2 Mild Italian Sausages
1/2 small Onion
1/2 cup Marinara Sauce
1/2 tbsp Italian seasoning
1 cup Sharp Cheddar, grated
1 tbsp Grated Parmesan
Spaghetti Noodles
Parsley for garnish, optional
Directions:
1. Put a pot of water on to boil for the noodles & cook, as always, according to the package. I do break the noodles in half before adding to the water, it makes stuffing the peppers a little easier. Cut the peppers in half, de-seed, and wash, set aside to drip dry. I just set them upside down on a paper towel until I'm ready to use them.
2. Chop your onion and add to a small frying pan with a little butter/oil. De-case the sausage into the pan and add the Italian Seasoning. Fry until lightly browned.

3. Once the sausage is browned and the noodles are done & drained combine both with the marinara sauce.

4. Divide the noodle mixture between each of the pepper halves. Remember to push it into any of the curves and bends in the pepper. Place in an oven safe dish and top with the cheddar and sprinkle on the parmesan.

5. Bake in a preheated 425*F oven for 20 - 30 minutes. Keep an eye on the cheese, you don't want it to burn but you do want the pepper to soften. If the cheese is browning too quickly, cover with aluminium foil. When done sprinkle with the parsley to add a little colour and serve. Enjoy!

Stay Sweet!
Tammy
Thursday, May 21, 2015
Chocolate Pound Cake
I live with a bunch of chocoholics. If there's even an ounce of chocolate in something it won't last more than a day to two. So, just imagine the bug-eye's I got when they came home to find a chocolate pound cake, with chocolate ganache and fudge buttercream. Yeah, it was like Christmas!


Chocolate Pound Cake

Cake Ingredients:
1 cup Cake & Pastry Flour
1 tsp Salt
3/4 cup Cocoa Powder
2 oz Semi-Sweet Bakers Chocolate, chopped
1/3 cup Boiling Water
1 cup Butter, softened
1 1/4 cup Granulated Sugar
5 large Eggs
6 Chocolate Covered Coffee Beans, optional
Directions:
1. Preheat your oven to 325*F. Grease and flour a 9 x 5 cake pan.
2. Sift together flour & salt in a separate bowl (not your mixing bowl) and set aside.
3. In another bowl add the chopped chocolate and pour the boiling water over it. Stir until the chocolate is melted, then add the cocoa powder. Mix well.
4. In your mixing bowl combine the butter and sugar until light & fluffy. Slowly pour in the chocolate and mix well. Add the eggs, one at a time, mixing well in between.
5. Slowly add the flour, remembering to periodically scrap down sides of the bowl. Once all the flour is mixed in pour the batter into the prepared pan. Bake for 1 hour or until a toothpick inserted in the centre comes out clean.
6. Let cool in the pan for 10 minutes and then turn out onto a wire rack. While the cake is cooling prepare the ganache.

Ganache Ingredients:
3 oz Semi-Sweet Chocolate
1/2 Heavy Whipping Cream
Directions:
1. Melt the chocolate in a double boiler. Once melted whisk in the heavy cream until silky smooth.
2. Pour over the top of the cake and use a cake spatula to push it over the edges for a nice dripping effect.
3. Refrigerate for 20 minutes to set the ganache. Prepare the fudge buttercream.

Chocolate Fudge Buttercream
1 3/4 cups Icing Sugar
1/4 cup Cocoa Powder
1/4 cup Butter, softened
3/4 cup Light Brown Sugar, packed
1/2 cup Half & Half Cream
2 oz Semi-sweet Baker's Chocolate
1/2 tsp Vanilla
1/4 tsp Salt
Directions:
1. Sift together the icing sugar and cocoa powder and set aside.
2. In a small sauce pan heat, over medium-low, 2 tbsp of the butter, brown sugar, and 1/4 cup of the half & half, stirring occasionally, until small bubbles form around the edges.
3. Reduce the heat to low and let simmer, continue stirring frequently until the mixture thickens slightly and turns a deep gold colour.
4. Transfer to a mixing bowl and add the remaining butter and half & half, mixing well. Slowly whisk in the icing sugar mixture. Cool to room temperature, stirring occasionally. Cool in the fridge until the desire consistency is reached.
5. Pipe a nice design around the cake and add the chocolate covered coffee beans.


Stay Sweet!
Tammy
Tuesday, May 19, 2015
The Ultimate Mashed Potatoes
The summer has officially started. We have our first long weekend under our belts here and what a beautiful three days it was. Not only did the weather completely cooperate, my family and I got to spend lots of BFF time with my bestie & her entire family. Fireworks, parades, and drinks on the patio until 1 am. It was perfect!
Now that it's Tuesday and life is back to normal with school and work; it got me thinking about the next long weekend. While we spend most of this past weekend in a neighbouring town, Canada Day will be spent at home with my extended family. BBQ's, lighting our own fireworks, and of course more drinks on the deck. Well, that's the plan as it sits now. I always like to offer up a selection of goodies when it comes to the bbq portion of the festivities. And I think I've come up with a winner for this years spread - mashed potatoes in a bacon cup! Give them a try and let me know what you think.

Ingredients:
16 slices Bacon
5 medium Potatoes
1/2 cup Sour Cream
3 tbsp Butter
1/4 cup Milk
3 cloves Garlic, pressed or minced as finely as possible
1 tbsp dried Parsley (plus more for garnish)
1 cup Sharp Cheddar, grated
Salt & Pepper
Directions:
1. Preheat your oven to 400*F. Soak 16 toothpicks in a small bowl of water while you get your bacon ready. Cut 8 strips of raw bacon in half. Place 2 of the cut pieces in an X on the bottom of a muffin tin cup. Repeat for the next seven cups. Weave the uncut strips around the ends of the cut strips following around the sides of the muffin cup (1 strip per cup). Secure everything with 2 of toothpicks stick into the sides making an X to hold the cut pieces to the side piece. Bake for 30 minutes, ciphering out the grease every 10 minutes or so depending on how much is accumulating in the bottom of the cup, I just use a baster to suck it out.

2. While your bacon is baking. Peel and cube the potatoes. Boil in salted water until soft. Drain and lightly mash. Add the butter, sour cream, and milk and continue mashing until very smooth. Stir in garlic, parsley, salt, and pepper until well combined.
3. Take the bacon out of the oven and remove the toothpicks and any of the remaining grease. Fill a piping bag that has a large opening in the bottom with the mashed potatoes. Fill each cup with the potatoes and top with the grated cheese. Return to the oven for 5 - 10 minutes or until the cheese melts. Carefully remove from the muffin tin, place on your serving dish and garnish with more parsley. Enjoy!

Stay Sweet!
Tammy
Now that it's Tuesday and life is back to normal with school and work; it got me thinking about the next long weekend. While we spend most of this past weekend in a neighbouring town, Canada Day will be spent at home with my extended family. BBQ's, lighting our own fireworks, and of course more drinks on the deck. Well, that's the plan as it sits now. I always like to offer up a selection of goodies when it comes to the bbq portion of the festivities. And I think I've come up with a winner for this years spread - mashed potatoes in a bacon cup! Give them a try and let me know what you think.
The Ultimate Mashed Potatoes

16 slices Bacon
5 medium Potatoes
1/2 cup Sour Cream
3 tbsp Butter
1/4 cup Milk
3 cloves Garlic, pressed or minced as finely as possible
1 tbsp dried Parsley (plus more for garnish)
1 cup Sharp Cheddar, grated
Salt & Pepper
Directions:
1. Preheat your oven to 400*F. Soak 16 toothpicks in a small bowl of water while you get your bacon ready. Cut 8 strips of raw bacon in half. Place 2 of the cut pieces in an X on the bottom of a muffin tin cup. Repeat for the next seven cups. Weave the uncut strips around the ends of the cut strips following around the sides of the muffin cup (1 strip per cup). Secure everything with 2 of toothpicks stick into the sides making an X to hold the cut pieces to the side piece. Bake for 30 minutes, ciphering out the grease every 10 minutes or so depending on how much is accumulating in the bottom of the cup, I just use a baster to suck it out.

2. While your bacon is baking. Peel and cube the potatoes. Boil in salted water until soft. Drain and lightly mash. Add the butter, sour cream, and milk and continue mashing until very smooth. Stir in garlic, parsley, salt, and pepper until well combined.
3. Take the bacon out of the oven and remove the toothpicks and any of the remaining grease. Fill a piping bag that has a large opening in the bottom with the mashed potatoes. Fill each cup with the potatoes and top with the grated cheese. Return to the oven for 5 - 10 minutes or until the cheese melts. Carefully remove from the muffin tin, place on your serving dish and garnish with more parsley. Enjoy!

Stay Sweet!
Tammy
Friday, May 15, 2015
The Cake Craze
As promised the cakes that have kept this baking machine working over-time.
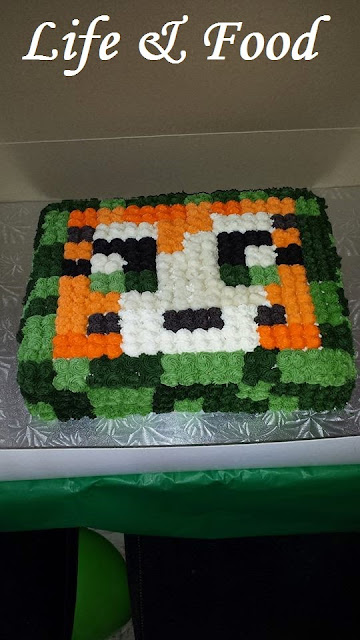
The first is a cake that I did for a friend's daughters 9th birthday. Let me tell you, I had no idea what Minecraft was really until she asked me to create this. I've heard of it, of course, from friends kids that played but I was completely oblivious as too the look of the characters or even the names. Let's all hail Google for a moment on this one because it really saved my bacon! A quick search for something called Stampy Cat - Minecraft and boom! There it was in all it's pixalated glory.
Don't the let the seemingly simple design fool you. This took some serious planning, and the execution & geometry had to be perfect. I learned this first hand because I had to wipe it clean when I was sooooo close to being done. My grid was off and the bottom portion looked like the vertical hold was going. So what I planned to have done in 3 hrs took me over 6. However, I think it turned out great! Well worth the sleepless night.

Next came another cousin request. A Monster High design on a half & half cake. I probably could have done this one in fondant but let's be honest here - kids don't like fondant, especially 5 year olds. When I do kids cakes I always try to use buttercream instead of fondant. I love the rustic look of the white buttercream with the piping of the emblem. I think this is one of my favourite cakes.

And finally, my cutie-pie cupcakes. These were ordered by a former co-worker, a real estate agent with a million dollar listing, and these babies were going to be offered at the open house. Let me tell you, I stressed about them for days! With being mini cupcakes decorating them is somewhat limited and it was made very clear to me that they had to be pretty. All I could think of was, 'what does she constitute as pretty?' I finally decided that I needed to keep things simple. No over decorating or lots of fondant, just a nice dollop of buttercream and little accents of fondant ribbon rosebuds would be perfect. So away I went. I even luster dusted the pink roses to add a little shimmer. The agent loved them <3 .

You will see some of these cakes again because I have tutorials & recipes for them. Keep checking back and see what's been cooking in my little kitchen.
Stay Sweet!
Tammy
The first is a cake that I did for a friend's daughters 9th birthday. Let me tell you, I had no idea what Minecraft was really until she asked me to create this. I've heard of it, of course, from friends kids that played but I was completely oblivious as too the look of the characters or even the names. Let's all hail Google for a moment on this one because it really saved my bacon! A quick search for something called Stampy Cat - Minecraft and boom! There it was in all it's pixalated glory.
Don't the let the seemingly simple design fool you. This took some serious planning, and the execution & geometry had to be perfect. I learned this first hand because I had to wipe it clean when I was sooooo close to being done. My grid was off and the bottom portion looked like the vertical hold was going. So what I planned to have done in 3 hrs took me over 6. However, I think it turned out great! Well worth the sleepless night.

After a complete crash from working on Minecraft, my cousin messaged me. She was having issues with getting her daughters Frozen cake ready. I offered to come over and help her out - at midnight. Girlie had decided to change up what she wanted on her cake. The original was suppose to be a "Barbie" style dress cake with Anna or Elsa but it turned out she didn't want her doll stuck in a cake, she wanted Olaf. So in the wee hours of morning, and with limited supplies Cousin & I managed to get this done. Not bad for 5 am and complete design change, I think.

Next came another cousin request. A Monster High design on a half & half cake. I probably could have done this one in fondant but let's be honest here - kids don't like fondant, especially 5 year olds. When I do kids cakes I always try to use buttercream instead of fondant. I love the rustic look of the white buttercream with the piping of the emblem. I think this is one of my favourite cakes.

And finally, my cutie-pie cupcakes. These were ordered by a former co-worker, a real estate agent with a million dollar listing, and these babies were going to be offered at the open house. Let me tell you, I stressed about them for days! With being mini cupcakes decorating them is somewhat limited and it was made very clear to me that they had to be pretty. All I could think of was, 'what does she constitute as pretty?' I finally decided that I needed to keep things simple. No over decorating or lots of fondant, just a nice dollop of buttercream and little accents of fondant ribbon rosebuds would be perfect. So away I went. I even luster dusted the pink roses to add a little shimmer. The agent loved them <3 .

You will see some of these cakes again because I have tutorials & recipes for them. Keep checking back and see what's been cooking in my little kitchen.
Stay Sweet!
Tammy
Tuesday, May 12, 2015
Music Monday-Battle of the best
I know I'm a little late for this weeks Music Monday so lets call this one Tunes Tuesday. And I'll be on track for next weeks post, promise :D
To do something a little different - I want your opinion! Tell me who do you think did this song better. Rod Stewart or Sarah Evans - My Heart Can't Tell You No.
Listen to them both and comment on your fav <3
Stay Sweet!
Tammy
To do something a little different - I want your opinion! Tell me who do you think did this song better. Rod Stewart or Sarah Evans - My Heart Can't Tell You No.
OR
Listen to them both and comment on your fav <3
Stay Sweet!
Tammy
Philly Cheese Steak Pizza
First of all let me apologize to the citizens of Philadelphia. I have never been your amazing city but I would like to. I hope I don't offend the true cheese steak purists too much with my rendition of their iconic sandwich in a pizza form. See, my exposure is limited to a Canadian take on it (and I've added a little cheater) and while what we serve up here in the Great White North is completely excellent, I have no clue how close it is to the real thing. I will, one day, find out! Let's get started,shall we?

Philly Cheese Steak Pizza
(my way)

Ingredients:
Pizza Crust (ready made or homemade)
1/4 cup Corn Meal, optional
1/4 cup Corn Meal, optional
1/2 medium Onion, sliced
1/2 medium Green Pepper, sliced
1 cup Mushrooms, sliced
1/4 cup Ranch Dressing
1/2 cup Mozzarella Cheese (grated) or Provalone (sliced), (I would have loved to use to use the Provalone but I only had Mozzarella on hand)
1/2 cup Garlic & Herb White Cheddar, grated
6 Slices of Roast Beef Sandwich meat, cut into short strips - this is my cheater :D
Directions:
1. Prepare the crust if needed. I've made mine from scratch but a store bought ready made will work just fine as well. If you do use a homemade crust I suggest using the corn meal as a base,especially if you use a pizza stone - this will make transferring the pizza to the stone much easier.

2. Preheat your pizza stone in a 400*F oven or as directed by your crust recipe.
3. Saute the onion, peppers, mushrooms in a little butter or oil until they just soft.

4. Add the ranch dressing to the crust as your sauce and spread for a nice even layer. I like very little crust on my pizza so I take the sauce almost right to the edge. The less crust the more toppings!

5. While your veggies are sauteing grate your cheeses and slice up the roast beef if you haven't done so already. Please ignore the cheddar in the picture - Daughter B prefer's just cheese pizza so I made her an individual 3 cheese pizza.

6. Now it's time to assemble. Spread out the sauteed veggies in a nice even layer over the ranch dressing and fill any spots with the sliced roast beef. Top everything with the cheeses.

1/2 cup Garlic & Herb White Cheddar, grated
6 Slices of Roast Beef Sandwich meat, cut into short strips - this is my cheater :D
Directions:
1. Prepare the crust if needed. I've made mine from scratch but a store bought ready made will work just fine as well. If you do use a homemade crust I suggest using the corn meal as a base,especially if you use a pizza stone - this will make transferring the pizza to the stone much easier.

2. Preheat your pizza stone in a 400*F oven or as directed by your crust recipe.
3. Saute the onion, peppers, mushrooms in a little butter or oil until they just soft.

4. Add the ranch dressing to the crust as your sauce and spread for a nice even layer. I like very little crust on my pizza so I take the sauce almost right to the edge. The less crust the more toppings!

5. While your veggies are sauteing grate your cheeses and slice up the roast beef if you haven't done so already. Please ignore the cheddar in the picture - Daughter B prefer's just cheese pizza so I made her an individual 3 cheese pizza.


7. Bake for 10 - 15 minutes on a pizza stone or 15 - 20 on a regular pizza pan. You want the crust to brown & puff up and the cheese to melt into a bubbly mess. Enjoy!

Stay Sweet!
Tammy

Stay Sweet!
Tammy
Subscribe to:
Posts (Atom)